Author: Kaya Noble

What to Expect From a Roof Replacement

A roof is a critical part of your home, stalwartly protecting it from wind, rain, and other environmental elements. Repairing or replacing a roof requires extensive materials, painstaking labor, and possibly special equipment.

Roof Replacement

It’s a major construction project that unfolds directly over your house, so it can be intimidating. It’s important to understand the basics of roof replacement before contacting a roofing professional. Visit https://www.delaware-roofing.com/ to learn more.

The type of roof material you choose for your home is one of the most important decisions that you’ll make during a roof replacement. It impacts not only your home’s aesthetic, but also its longevity and durability in extreme weather conditions. It’s best to determine your desired lifespan, as well as the maintenance requirements of each roofing material before making your final decision. Moss, mildew, and water damage are common roofing issues that you’ll want to avoid.

Metal roofs, also known as standing seam roofs, are ideal for low-slope or flat roofs and can last up to 50 years. They are very durable and can withstand heavy snow or hail. They are energy efficient and help homeowners save on heating and cooling costs. Metal shingles and shakes can be made to look like traditional asphalt shingles, wood shakes, clay tiles, or slate and are an excellent choice when appearance is a concern.

Another popular option for a residential roof is a tile roof. These are available in a variety of colors and styles and add elegance to any home. Clay and concrete tiles are beautiful, durable, and can be found in a range of prices. They are a great choice for homes that have a Spanish or Mediterranean design.

A third type of roofing is a roof membrane, which is an effective waterproofing option. It consists of several layers with an organic or glass-fiber mat in between. The bitumen that seals the membrane can be asphalt or coal tar, which must be heated to apply, or cold-applied adhesive. The latter is the most popular, as it doesn’t require heat to apply and dries quickly.

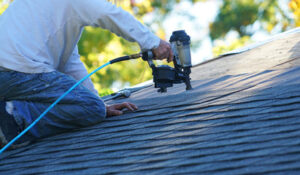
Besides the roof materials, you’ll need to have the right tools for the job. A roofing contractor will need a power drill, hammer, and ladder for installing the roof. A nail gun and utility knife can speed up the process and ensure that shingles are securely attached. A chalk line will also be helpful for creating a straight line on the roof to ensure that your shingles are evenly spaced.

Installation

The day the roofers arrive, they’ll set up protective coverings over your yard and driveway, then start removing your old roof. They’ll take off rubber or lead boots around sanitary stacks, lift up vents and carefully remove the roofing material itself. The roofing contractor will also replace any attic ventilation – ridge and roof vents and gable or soffit vents – to help keep hot and cold air flowing through your home and reduce energy costs.

You may want to talk to your neighbors ahead of time about the roof replacement and ask if they’d be willing to unlock their gates so the crew can get on and off their property. This will prevent them from feeling like they’re being invaded by a construction site, and you can also tell them to expect some shingle debris and dust blowing into their yards.

Once the shingles are removed, your roofing professional will inspect the decking and sheathing and make any necessary repairs. If sheathing is rotting or soft, it should be replaced rather than trying to fix it by placing new shingles over the top of it. That’s just a band-aid that will eventually fail and result in expensive repairs.

Next, a layer of asphalt roofing paper is applied to the sheathing. It creates an inner barrier to keep water from penetrating the sheathing and into your house. It’s then covered by a layer of granules to give it added weatherproof protection and to make the surface look nicer.

If you live in a region with heavy snow, your roofing contractor will probably install metal snow guards and snow retention systems to minimize the weight of the snow and the damage it can do to the roof. They’ll also install ice and water shields under the shingles in key areas to prevent water leaks.

At this point, your contractor will start laying the new shingles. They’ll typically start at the eaves and metal drip edge and work upward toward the peak of your roof. They’ll also add a strip of self-stick underlayment on the valleys, along the edges of the roof and in other leak-prone spots.

Inspection

Before beginning a roof replacement, the contractor will carefully inspect your existing roof. Typically, this is done in the springtime when conditions are mild and rainstorms less frequent. The inspection will look for things like curled, loose, or missing shingles; moss, lichen, and other plant growth; and buckling, bubbling, or discoloration of the roof sheathing. This is an important step, as it will give the inspector a good idea of your roof’s remaining lifespan and whether it can be repaired or replaced.

The inspection will also check for cracks or deterioration of the thin metal flashing that lines roof penetrations–plumbing vents, attic fans and vent pipes, skylights, chimneys, and so on. This is an important area to look for, because leaks in these areas can cause extensive water damage to the ceilings and walls of a home. The inspector will also examine fascia and soffit boards, the horizontal boards that run along the edges of roof overhangs. These are vital for preventing wood rot and insect infestation and help to keep the sheathing protected.

The inspector will also check for shingle granules in the gutters, which is a good indicator of how well the roof shingles are holding up. If the granules are gone, it’s time to consider a roof replacement. Finally, the inspector will examine the interior of a home for signs of a leaky roof, such as mold, mildew, or stains on the ceiling and walls.

If your roof has been through a storm, it’s especially important to have a professional inspect it as soon as possible. The pros have the equipment and knowledge to safely climb up on a roof and look for any storm-related damage. They’ll look for lifted overlaps and delaminating roof materials, as well as inspect the interior attic and ceilings for stains.

Once the inspection is complete, the roofing contractor will make a written report and provide recommendations for repairs. Then the project can begin! A well-inspected and properly-repaired roof will last for years, protecting your home’s structural integrity and preserving valuable possessions like artwork, family memorabilia, and sentimental furnishings.

Maintenance

A roof is the first line of defense against outside elements, so it’s important to keep up with maintenance procedures. This prevents small issues from getting worse and requiring expensive repairs. Regular inspections can help identify potential problems before they become a major issue, such as leaks or mold.

Roofing companies often offer programs that include regular inspections, cleaning and standard repair work. These services can maximize the life of your new roof and save you money in the long run. They can also keep your home safe and protect your investment.

The most obvious difference between a roof replacement and a roof repair is the extent of damage. A repair is limited to the affected area, while a replacement includes replacing all damaged materials. The choice between repair or replacement depends on a variety of factors, including the age of the roof and the extent of damage.

During a roof inspection, the contractor may check for missing or curling shingles or tiles. These should be repaired or replaced as soon as possible to prevent water penetration. They will also inspect the flashing, which is metal material that seals the intersections of the roof, such as around chimneys and vents. Leaks can occur when the flashing isn’t in good condition. They will also check the valleys of the roof to ensure they are free from debris and that water is flowing properly through the system.

They will also look for stains on the ceilings of the house, which can indicate a roof leak. Stains in the attic or on the ceiling of the living room are particularly concerning because they indicate water penetration and can cause serious structural damage. The contractor will also look for signs of mold, fungus or algae, which can cause the shingle materials to break down and leak.

In some cases, the contractor will replace the fascia, which is a long wooden board that protects the bottom edges of the roof. The contractor will re-stain or paint the fascia to match the color of the new roof. They will also replace the gutters if they are damaged or clogged with debris and clean up any debris that has fallen onto the roof surface.

Tips For Air Conditioning Repair

Before you call a professional, there are some basic tips to keep in mind. These include checking your evaporator coil and capacitor, cleaning your air filters, and checking for leaky ductwork. Following these tips will help you to avoid costly repairs later on. Keep reading to learn more about air conditioning repair. For more information you can visit this website at https://alltemprefrigerationfl.com/.

Fixing leaky ductwork

hvac

Leaky ductwork can cause a home’s HVAC system to work harder than it should. Leakage can reduce your system’s efficiency by up to 20%. Luckily, sealing these leaks is a simple DIY project that can help you improve the indoor air quality in your home.

First, you’ll need to inspect your ductwork. Make sure to seal any leaks you find. Use metal duct tape, which is stronger than regular duct tape. You may also want to use a mastic sealant. And wear a pair of rubber gloves!

Leaky ducts can affect your home’s indoor air quality, contributing to allergies, asthma, and other respiratory problems. In addition, leaky ducts can pull dust from basements and attics into your home. While the dust isn’t dangerous, it can negatively affect the air quality in your home.

Call a professional HVAC repair specialist if you can’t spot leaks yourself. The HVAC technician will have the tools and experience to detect the problem and use the most effective repair strategy.

Checking your air conditioner’s capacitor

If your AC unit is not blowing cool air anymore, it may be due to a capacitor failure. You can spot this problem on particularly hot days by noticing if the air conditioner struggles to keep your home cool under the direct sun. A multimeter is a handy tool that you can purchase at any hardware store.

The capacitor is located on the side of the AC unit, or underneath. It will have a small hinged door. To open it, you might need a screwdriver or a latch. Once inside, you’ll find a small metal cylinder with two or three terminals. Make sure that the wires are properly connected.

When the capacitor is bad, the condenser fan motor won’t start, and the condenser won’t blow cold air. This is a sure sign that your capacitor is failing to deliver the stored energy needed to run the compressor or motor. In addition, if you notice that cold air is not coming from the vents, you may need to contact an AC repair professional to diagnose the problem.

Cleaning your air conditioner’s filters

It’s important to clean your air conditioner’s filters regularly, especially if you’re prone to mold growth. The spores in mold can spread throughout the air and cause respiratory problems for anyone exposed to them. Keeping the unit turned off and its filter clean is easy to help keep the air in your home clean.

To do this, all you need is a vacuum cleaner with a hose attachment. Fill the hose with water and use gentle pressure to wash out the dirt. Afterward, make sure that the filter is completely dry before replacing it. You can also use a hairdryer or let the filter dry naturally. Do not leave it wet for too long, as it will cause mold to grow.

Keeping your air conditioner’s filters clean is crucial to maximizing the air flow and air quality in your home. Clogged filters make it difficult for air conditioners to function properly and reduce the unit’s overall effectiveness. It’s a good idea to clean your filters regularly, especially in high-use seasons.

Checking your evaporator coil

If you notice a sudden drop in temperature or a leaking evaporator coil, it may be time to get your air conditioner serviced. It’s important to note that you may need to replace the entire coil, or a part of it, depending on the extent of the problem. Repairs are possible, but they can be expensive. In most cases, replacement is the best option.

To inspect your evaporator coil, remove the plastic or metal casing on your air conditioner. The coil is usually located deep inside the casing. Refer to the user’s manual to see where you can find it. You can also check the static pressure in the system.

The evaporator coil is an essential part of your air conditioning unit. It absorbs heat from the air and transports it into the home where it can cool it. If the evaporator coil is dirty, the cooling capacity of your air conditioning unit will be significantly reduced. To prevent this, you can clean the coil yourself or get a professional to do the job.

One of the most important components of your home is your air conditioning unit. Unfortunately, sometimes this unit can stop working properly due to under or over-service. Regardless of the cause, these HVAC problems must be addressed quickly to prevent extreme temperature changes and potential flooding. Luckily, most common AC problems are relatively easy to fix.

Problems with capacitors

If you notice a strange burning smell coming from your air conditioning system, it might be caused by a bad capacitor. The simplest capacitor consists of two conductors with gaps in between them. The two conductors each store an electron with either a positive or negative charge. When one of the two is faulty, the air conditioner will stop cooling or won’t start.

Before attempting to replace a capacitor yourself, double-check the connections. If they are not right, it can lead to the compressor overheating and damaging the capacitor. Also, be careful to use solid pressure when installing the capacitor. Capacitors with screws should snap into place.

Problems with condensate drain

While the condensate drain isn’t the most complicated mechanical part of an air conditioner, if it breaks down, it can cause foul sewer smells and even flooding, which can cause serious water damage to your home. Here’s what you need to know about the common problems with condensate drains.

Blockages and rust typically cause problems with a condensate drains. The condensate drain line is a PVC pipe that connects the indoor and outdoor units. The drain line carries condensate from the condensate pan outdoors, and it can be clogged or blocked by tiny debris inside the AC unit or algae growth.

While problems with the condensate drain can be difficult to diagnose, a qualified HVAC service should be able to trace the problem through the drain line to determine where the problem lies. This can help prevent further damage. Regular system maintenance should also identify worn or damaged parts and prevent future issues. Regular flushing with water can also prevent problems from occurring.

Problems with tripped circuit breakers

A faulty AC unit often causes tripped circuit breakers. This problem can be solved by having the unit cleaned thoroughly. Professionals will have the proper chemicals and equipment to clean the unit. Another common cause of tripped circuit breakers is short circuits. This is when two normally sheathed wires touch and an electrical current travels through a low-resistance path.

Sometimes, a tripped circuit breaker can be caused by an overly-condensed refrigerant. This causes the compressor to work harder than normal, drawing extra power. In such a case, it’s imperative to call in a certified technician to repair the unit. Other common causes of tripped circuit breakers include dirty air filters that prevent proper airflow through the ductwork and cause the air handler to work harder than normal. Additionally, a clogged outdoor unit or condenser coil can overload the circuit breaker, causing it to trip.

Problems with leaking air conditioners

Leaking air conditioners can happen for a variety of reasons. Most of the time, the problem stems from a broken or clogged condensate drain line. When this drain line is clogged or dirty, water will accumulate in the drain pan and overflow.

Another possible cause of leaking air conditioners is improper installation. The condensate drain line must be angled downward so water can drain correctly. If the pipe is too high, it may cause the water to back up and sit in the drain pan. If you suspect improper installation, you can try using a wet/dry vac to clear the obstruction, but be careful not to damage any components of the air conditioner. If you’re unsure how to fix the problem, consider hiring an AC service company that provides installation and maintenance services.

Depending on the location of the AC unit, the drain line may disconnect. It could be caused by improper installation or repair work. A dirty filter can also cause a clogged drain line. Dirty filters can prevent air from flowing through the evaporator coil and result in water leakage.

Problems with clogged drain lines

One of the most common air conditioning repair problems involves clogged drain lines. To resolve this problem, you must first determine the cause of the clog. If you suspect that it is caused by a buildup of debris from your home, you can try a home remedy by pouring a cup of bleach down the drain line. However, use caution when using bleach, as it can damage the AC system. Another common home remedy involves letting a bucket of water flow down the drain line.

Fortunately, a clogged drain line is not as difficult to fix as you might think. AC technicians typically clean drain lines as part of routine maintenance. The technician can also use high-pressure air to blow out the clog. You can also try draining the drain line and cleaning the drip pan to remove algae, dirt, or other debris. Changing the filter in your AC can also help prevent clogged drain lines.

Navigation